Showing posts with label sweets. Show all posts
Labels: , ,

Homemade Chocolate Chip Cookies


Believe it or not, Hubby made these delicious cookies. He was feeling inspired to bake so he searched for the "Best Chocolate Chip Cookie" recipe and found it here. It really was good, and we made a ton! It kinda' looked like our favorite Nestle Tollhouse Cookies, but the batch we made was a bit thick. And unlike the real thing, these cookies are not that sweet. A good thing for me, but not for hubby's sweet tooth. 


I enjoyed these cookies tremendously, and I'm sure you will too!


What you need:

1 1/2 cup all purpose flour
1/2 cup butter, softened
1/2 cup white sugar
1/2 cup packed brown sugar
1 egg
1 teaspoon vanilla extract
1 teaspoon hot water
1/2 teaspoon baking soda
1/4 teaspoon salt
1 1/2 cups semi-sweet chocolate morsels


What to do:

Preheat oven to 350°F.  

In a large bowl, beat together butter, white sugar, and brown sugar until smooth. Add in one eggs at a time, then vanilla. Continue beating until combined. Dissolve baking soda in hot water and add to batter along with salt. Stir in the flour and chocolate chips.

Tear a small piece (1 1/2 tablespoons) from the batter and work into a circle. Flatten it a bit and place on a pan lined with parchment paper. Bake for about 8 to 10 minutes, or until edges are nicely browned.


Tips, Tricks and Tweaks:

1. Original recipe calls for walnuts. We didn't have any so we skipped it. If you want to add some, use 1/2 cup.
2. We like our cookies soft and gooey. If you want them a bit harder, add a minute or two in the cooking time.
3. For a more uniform batch of cookies, use a tablespoon or ice cream scoop to measure the amount of batter.
4. Adding 1/4 teaspoon cream of tartar will make the cookies a bit harder as well.  
 

4 comments
Labels:

Chocolate Butterscotch Cupcakes

I have to admit, frosting is not my strength!

Belated happy valentine's day! I hope you had a sweet one. Here is my post-Valentine offering for you.

I made this sweet treat after seeing that we have a pack and a half of butterscotch morsels in the pantry. And because I was lazy pressed for time, I just used the boxed cake mix instead of making it from scratch. So yes, this is another semi-homemade recipe, but one of the best ones I have made. The cake was delicious and moist, and the butterscotch frosting was just heavenly. Hubby couldn't stop eating them!

I adapted and tweaked the frosting recipe from here
 

What you need:

boxed cake mix (I used Duncan Hines Triple Chocolate Decadent cake mix)
3 eggs
1/3 cup Canola oil
1/2 cup butterscotch morsels

For the frosting:

2 sticks unsalted butter (room temperature, divided)
1 1/2 cups sifted confectioner's sugar
1 cup dark brown sugar
1/2 cup heavy cream
1 teaspoon vanilla extract
1/4 teaspoon Kosher salt


What to do:

Preheat oven to 350°F.

Prepare cake according to package directions. Add 1/2 cup butterscotch morsels to the batter. Place in baking cups and bake for around 12 minutes.

Meanwhile, make the frosting.

Sift your sugar!
In a medium saucepan over medium heat, melt 4 tablespoons of butter for about 7 to 8 minutes or until golden brown. Add the brown sugar, salt and heavy cream. Whisk until sugar dissolves and mixture is smooth, about 3 minutes. Remove from heat and transfer the mixture to the bowl of your electric mixer.

Beat the mixture on medium speed for around 10 minutes. Pour in vanilla extract, then add the remaining butter, one tablespoon at a time, making sure that each addition has been incorporated. In a steady stream, add in the confectioner's sugar and beat for another minute or so. If the frosting is not firm enough for piping, cover and refrigerate for around 30 minutes or until firm enough to pipe.

To assemble the cupcake, place frosting in a piping bag with the tip of your choice (I used WIlton's 1M Swirl tip). Frost the cupcake and top with candy sprinkles. Enjoy!

Hubby couldn't wait and ate one before I could even frost it!

Tips, Tricks and Tweaks:

1. I used boxed cupcake mix for this recipe, but feel free to make yours from scratch! I recommend this chocolate cake recipe, especially if you like dark!
2.  If you don't have piping bags, just use a resealable bag and cut one corner. Voila! Instant piping bag.
3. Don't forget to refrigerate your frosted cupcakes! (The frosting will "melt" if you just leave it sitting on the counter).

4 comments
Labels: ,

Holiday Baking


There's something about this season that makes me want to bake... I don't know... maybe the delicious treats that my co-workers have been bringing, or the Christmas cartoons that are airing on TV... or maybe thes December 2012 edition of my Food Network Magazine! ;-)


Anyway, I was really not in the mood to cook, and all I can think of is baking some cookies. Coincidentally (or not!), I have some sugar cookie dough in the fridge that are just begging to be made. So I told hubby that I want to bake some cookies, and he shocked me by saying, "Well, I'm also not very hungry. How about we have cookies and coffee for dinner?" I kid you not, at that moment I thought I heard angels singing and I was reminded of why I love hubby so much. :-)

So we ditched our earlier dinner plans of nachos and instead had the sweetest, unhealthiest dinner you can possibly think of. As we were eating, hubby said "It's great to be an adult! We can do and eat whatever we please!" Ah, ain't life grand sweet? 


By the way, I made several kinds - plain sugar cookies, frosted sugar cookies, and Snickerdoodles. Take your pick!

Snickerdoodles action!
On a separate note, I want to thank you guys for always being there. I know I haven't been posting a lot lately - I just can't seem to find time between my school work and a shop. And of course, there's this little matter of having a family to take care of. And a mini-farm to run. Yep, never a dull moment.

And I want to wish you all a Merry Christmas and a Happy New Year!


What you need:

1 pkg (1 pound) sugar cookie dough (I used Pillsbury)

For the Snickerdoodles: 

1 1/2 tablespoons of granulated sugar
1/4 teaspoon ground cinnamon

For Sugar Cookie Frosting:

1/2 cup confectioners sugar
3 tablespoons evaporated milk
1 teaspoon light corn syrup
1/8 teaspoon vanilla


What to do:

Preheat oven to 350°F. Cut cookie dough into 1/2 inch rounds.  Place on cookie sheet lined with parchment paper.

Prepare the Snickerdoodles first. In a small bowl, combine granulated sugar and cinnamon. Mix well. Take several pieces of cookie dough rounds to make Snickerdoodles (I made 6) and roll them in the sugar-cinnamon mixture. Then place them on a separate cookie sheet for baking.

Place in the pre-heated oven and bake for around 12 minutes. Once baked, place on a wire rack to cool.

Meanwhile, make the frosting. In a medium-sized bowl, mix the confectioners sugar and evaporated milk until smooth. Add the corn syrup and vanilla, then beat with an electric mixer until you reach your desired consistency. You may add more milk or sugar depending on how thick you want it. Set aside.

When the cookies have cooled down, start decorating! Using a spatula or even a fork, spread the frosting on top of the cookies. Top with your candy sprinkles of choice. Enjoy!

Tips, Trick and Tweaks:

1. When frosting cookies, make sure they are cooled down - or the frosting will just melt or slide away. No bueno.
2. Work quickly so the frosting doesn't dry out!
3. I used "slice and bake" cookies, but feel free to make yours from scratch. :-)

3 comments
Labels: ,

Soul Sweet 'Taters

Happiness on a dish!
This was the dish I made for our Thanksgiving dinner a few days ago. I am thankful for family and friends that visited, which resulted for a merrier celebration and less dishes to cook (for me, at least!)

Fair warning - this dish is addictive! It is like a side dish and dessert rolled into one! The creaminess of the sweet potatoes combined with the crunch of pecans and brown sugar is sure to send you to tater heaven!  I am telling you - it was gone so fast, I didn't even get the chance to have seconds!

This recipe is from the November 2012 edition of Food Network magazine, from one of my favorite bloggers Ree Drummond. Tweaked, of course, for my family who has a horrible case of sweet tooth (or teeth, for that matter!)


What you need:

4 medium sweet potatoes (about 1 3/4 pounds)
1 cup white sugar
1 cup milk
2 large eggs
1 teaspoon vanilla extract
1 teaspoon salt
1 1/4 cup packed dark brown sugar
1 1/4 cup pecans
1/2 cup all-purpose flour
6 tablespoons unsalted butter, at room temperature


What to do:

Preheat the oven to 375°F. Cover each potato with foil, then place them on the oven rack and bake for about 45 minutes.

When the potatoes are done cooking, let cool for about 5 to 10 minutes. Remove foil then slice them open lengthwise and scrape off the flesh with a spoon into a large bowl.  Increase the oven temperature to 400°F.

Time to cool off!

Add the white sugar, milk, eggs, vanilla and salt to the bowl with the sweet potatoes. Using a potato masher, mash the mixture until combined and slightly lumpy.

Lumpy and bumpy? Yessiree!

In a separate bowl, mash the brown sugar, pecans, flour and butter with a fork until thoroughly combined. The mixture should resemble a crumble.


Yes, my dear friend. That is the pure deliciousness.

Spread the sweet potato mixture in 1 14-cup oval-shaped baking dish and sprinkle the crum mixture on top. Bake for about 30 minutes.

This was how it looked like before going into the oven


Tips, Tricks and Tweaks:

1. Pecans would be the best nut for this job, but I imagine walnuts would also do good. 
2. When sprinkling the top with the crumbles, make sure you cover it evenly - for even yuminess!
3. Instead of 1 cup of milk, try 1/2 cup milk and 1/2 cup heavy cream! 

3 comments
Labels:

Tropical Dump Cake


One evening, I invited my in-laws over to have dinner in our house, and my mother-in-law suggested that we have "Dump Cake" for dessert. It was the first time I have ever heard of it in my entire life, and the images that danced in my mind weren't very pleasant. The first words that came out of my mouth was, "uhhh.... DUMP cake?" And my mother-in-law said, "yes, it is called dump cake because you dump together all the ingredients. It's very easy."

So after showing me the recipe and how to make it - which was indeed easy because all you have to do is dump everything in a crock pot - I was sold! Actually, I was told that dump cake is traditionally baked in an oven like a regular cake. But since this is my first dump cake, I am thinking that I would forever make it in a crockpot. ;-)

Fair warning - this cake is highly addictive because of all the sugar, butter, and syrup in it! But these ingredients are what makes it taste so AWESOME! 

Recipe adapted and tweaked from here.


What you need:

5 packs (3.75 oz each) fruit cups in juice (tropical fruits)
2 teaspoons cornstarch
1/4 cup packed brown sugar
1 cup butter, softened (not melted)
1 box yellow cake mix (I used Betty Crocker)


What to do: 

Grease your crock pot by spraying it with cooking spray. Reserve 1/2 cup of juice from the fruit cups; pour the remaining juice and fruits in the crock pot.

Tropical fruits galore!

In a small bowl, combine the reserved fruit juice and corn starch. Mix well. Pour the mixture in the crock pot and stir.

Sprinkle brown sugar, then the cake mix on top of the fruits. Cut butter in small pieces and place over the cake mix. Make sure all parts are covered with these ingredients!

Cover and cook on low for about 3 hours, or until cake is set when lightly touched in the center. Spoon warm cake into dessert bowls and top with fruit mixture. Enjoy!


Tips, Tricks, and Tweaks: 

1. You can also do this recipe using just one kind of fruit - say, peach. Or blackberries. Or pineapples. You get the drift.
2. A sprinkle of cinnamon with the brown sugar would be very good, I imagine.
3. As I have mentioned above, you can make this cake in an oven if you don't have a slow cooker.


4 comments
Labels:

Nutella & Go!


Oh, what a sweet, sweet treat! This reminds me of a similar product called Yan-Yan that I used to enjoy as a kid. I remember that bringing a Yan-Yan to school elevates your status because all your friends would be crowding around you in the hopes of getting a piece of bread stick dunked in thick chocolate.

Nutella & Go is not a new product. I believe it was released in 2009, but I have only recently seen it in local grocery stores. After sampling a pack, here is what I thought.


What I like:

- Delicious. I might be biased of course - I love Nutella and Ferrero chocolates.
- Cheap thrill. Only about $1.50 a pack.
- Chocolate is thick and creamy. The same consistency you would find in a jar of Nutella spread.
- Convenient. Small enough to fit in lunch boxes, but big in taste.
- Enough chocolate to last (and even outlast) the bread sticks.
- Bread sticks are small enough to dip in the chocolate without breaking them.


What I didn't like:

- 260 calories a pack. Well, this is the price you have to pay for something this good. I imagine I would get more with my usual "spoon out the Nutella from the jar and eat it" ritual so I guess this is worth it. 
- Hard to find in grocery stores. Really? Where are you hiding them?


The Verdict: 

Yes, I will definitely buy them again - if I ever find them! They are great snacks and you won't feel very guilty eating them since there are "bread sticks" with the chocolate (yeah, keep saying that to yourself). Would I recommend them to a friend? Absolutely. 

Disclaimer:  Nutella has been in the news lately for a lawsuit. This post is not sponsored by Nutella. I wrote this post several days ago, but wasn't able to publish it until now.

5 comments
Labels:

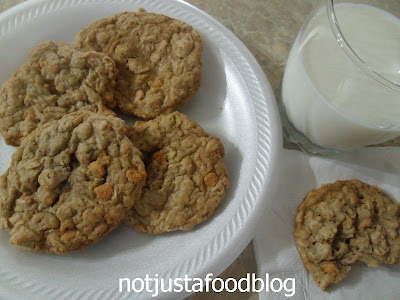
Oatmeal Butterscotch Cookies


I have to admit - these delightful cookies are not my work. They were baked by my mother-in-law. She followed the recipe from a Quaker Oats box to create these delicious treats. They were so good that I checked my pantry to see if I had butterscotch chips myself, and was so happy to find a pack. Unfortunately, I have not gotten around to baking these yet. I promise I will - unless I think of a better way to make use of the butterscotch chips.

Speaking of Quaker Oats, "Larry" aka the Quaker Oats guy, got a slimmer look lately. He definitely looked healthier. He must be eating better (more oatmeal?).

Anyway, did you know that aside from being a healthy food, oatmeal is also an all-around wheat? You can use it to treat acne (sweet!), neutralize odors, soothe dry or irritated skin, and even to make modelling clay! Wow... time to stock up!

This recipe was adapted from QuakerOats.com. 


What you need:


1 stick + 6 tablespoons butter, softened
3/4 cup firmly packed brown sugar
1/2 cup granulated sugar
 2 eggs
1 teaspoon vanilla
1 1/2 cups all purpose flour
1 teaspoon baking soda
1 teaspoon ground cinnamon
1/2 teaspoon salt
3 cups oats
11 oz package butterscotch chips


Look at those yummy butterscotch chips... *drool*

What to do:


Heat oven to 350°F. Line a baking pan with parchment paper.


Using your electric mixer, beat butter and both sugars (brown and granulated) in a large bowl on medium speed. Add eggs and vanilla, beat well to incorporate. Add flour, baking soda, cinnamon, salt, butterscotch chips and oats. Mix well.


Scoop a tablespoonful of the mixture and place on lined baking pan.


Bake for 8 to 10 minutes or until light golden brown. Let sit on a cooling rack for about a minute before serving.


Tips, Tricks and Tweaks:


1. Original recipe called for raisins. Feel free to add some if you wish!
2. Always serve with a glass of milk!

3 comments
Labels: ,

Semi-Homemade Monkey Bread

Well, hello raisin and walnut! Welcome to the party!

Lo and behold - the Monkey Bread. This was my first time to try this delicious bread, and I loved the oooey gooey sticky goodness. The monkey bread pictured above was actually my mother-in-law's. She brought it to a school breakfast several weeks ago, and it was gone faster than I can say "save me some more!"

 
To eat monkey bread, you have to pull it apart using your hands. That is why some people call it "Pull-Apart Bread." Aside from those two names I mentioned, they are also called sticky loaf, pinch-me cake, golden crown, bubble loaf, and monkey brains. Now the last one kinda' gave me the creeps - I would hate to think that the delicious thing that I so eagerly ate would actually be brains. 

But there's still something gnawing at me - why MONKEY, of all animals? Surely, there has to be a logical answer, right?

Well, thank you Google for telling me the answer. Actually, I looked at several websites and found a number of explanations. 

Some said that the act of pulling it before eating resembles monkey behavior (although I have never seen a monkey pull apart a banana!). Others said that it requires a good amount of "monkeying around" to prepare the dough (this won't happen in this recipe because I am using pre-packaged dough!).

The one I am most inclined to believe in is that baked monkey bread resembles the monkey puzzle tree. So judging from the picture below, what do you think?
Monkey Puzzle Tree bark Picture Credit

This recipe is adapted from the Pillsbury website. Yet again, it is semi-homemade because we used pre-packaged biscuit dough. Trust me, you would want to make this as quick as possible so you can get your hands on those sticky morsels of yumminess! 


 What you need: 

2 cans (16.3 oz each) Pillsbury Grands! refrigerated buttermilk biscuit
1 cup firmly packed brown sugar
3/4 cup butter, melted
1/2 cup granulated sugar
1/2 cup chopped walnuts
1/2 cup raisins
1 teaspoon cinnamon


What to do: 

Heat oven to 350F. Lightly grease a fluted pan (or Bundt pan) with butter or cooking spray. In a large resealable bag (like ziploc), mix granulated sugar and cinnamon.

Remove the dough from the cans. Separate them, and slice each biscuit into quarters. Place all the pieces in the resealable bag and shake well, making sure that each piece is covered with cinnamon sugar.

Arrange the pieces in the pan, adding walnuts and raisins among the biscuit pieces.

In a small bowl, mix brown sugar and melted butter. Pour this mixture over the biscuit pieces.

Bake for 28 to 32 minutes, or until golden brown. Let cool in the pan for about 10 minutes. Turn upside down onto serving plate, serve warm.


Tips, Tricks and Tweaks: 

1. Raisins and walnuts are optional in this recipe. (I recommend it, though)
2. Pecans (or your favorite kind of nuts) can also be used for this recipe.
3. Add a tablespoon of vanilla to the sugar-butter mixture to give it some depth.

6 comments
Labels: ,

Bacon-Maple Bar

They don't look very pretty, but they're so delish!

This was another accidental dish as Hubby was just munching on some cashews and realized that they were too salty, so he made cashew butter instead. We already have a recipe of cashew butter here, but the one we made today turned out to be different (cashew too salty) so we tweaked it. 

I trust Hubby when it comes to anything sweet (that is his forte), as sugar is the main staple in his diet. I am still trying to convince him that sugar is not an actual food group (or if it is, don't tell him!).

We countered the saltiness of the cashew nuts by adding maple syrup (and wildflower honey) to the crushed nuts. And because of the maple syrup, hubby thought it would go well with bacon or any other breakfast-related items. Hence, the Bacon-Maple Bar was born. ;-)

I didn't want to partake at first, as it didn't look so appetizing to me, but one bite and I was hooked! It was really delicious - the saltiness of the bacon, nuttiness of the cashew, and the deep sweetness of the drizzled maple syrup was just wonderful! This is breakfast and dessert rolled into one!


What you need:

2 cups roasted cashew nuts (salted)
3 tablespoons wildflower honey
1 tablespoon maple syrup
1/3 cup peanut oil
3 strips (or more) of cooked bacon


What to do: 

Start by heating the honey in a microwave-safe bowl for about 15 seconds. This is so the honey would be a bit runny and easier to mix in. After heating, add in the peanut oil and set aside.

Place the cashew nuts in the food processor, cover, and pulse for about 5 to 10 seconds. Continue doing so, while slowly drizzling the oil-honey mixture. Process until it is smooth. Add more peanut oil if it seems thick.

Slather on top of cooked bacon and drizzle with more maple syrup. Enjoy!


Tips, Tricks and Tweaks: 

1. Taste would depend on a lot of factors. If using unsalted roasted nuts, add about a teaspoon of salt. Tweak honey/syrup amount according to your preference.
2. We used real maple syrup. Not sure how artificial maple syrups would taste.
3. Less is more. Start with a little bit, mix it, taste it. Tweak, and continue until desired taste is acquired.

3 comments
Labels:

Better Than Almost Anything Cake

Look at how moist it was...

I baked this cake based on the recommendation of my mother-in-law. She said it was one of the best (if not the best) cake she has ever had. Of course, just the name of the cake itself would make you curious and wonder if it was really "better than almost anything." (By the way, we didn't come up with the name of the cake - Betty Crocker did!).

This cake is semi-homemade, the ingredients are simple and the results are VERY satisfying. It was moist, sweet and delicious! I have to give you a fair warning, though - this cake is a dieter's nightmare! But of course, "no one ever got fat by eating one cookie." So if you have just a slice to satisfy your sweet tooth, it's fine. DON'T eat the entire cake by yourself (although hubby tried!).

This recipe is from Betty Crocker's "Our Best Desserts" compilation.  


What you need: 

1 box German Chocolate cake mix
water, vegetable oil and eggs called for on cake mix box
1 can (14 oz) sweetened condensed milk
1 jar (16 to 17 oz) caramel topping
1 container (8 oz) frozen whipped topping, thawed
1 bag (8 oz) toffee chips (I used Heath) 


What to do: 

Heat oven to 350°F (325°F for dark or nonstick pan). Bake cake as directed on box for 13x9-inch pan.

Poke top of warm cake every half inch with the handle of a wooden spoon. Drizzle milk evenly over the top of the cake; let stand until milk has been absorbed into cake. Drizzle with caramel topping. Run a knife around the sides of the pan to loosen the cake. Cover and refrigerate for about 2 hours or until chilled.

Carefully remove the cake from the pan and place on a cake tray. Spread whipped topping over top of the cake. Sprinkle with toffee chips. Store covered in the fridge. 


Tips, Tricks and Tweaks: 

1. Do not use any other cake mix aside from the German Chocolate. I say so because I found that German Chocolate mix is not as sweet as regular chocolate mix. As you can see, this recipe has a ton of sugar/syrup in it and the milder taste of German Chocolate Cake works perfectly.
2. You can use butterscotch or fudge topping if you're not a big fan of caramel.
3. Substitute toffee bits with butterscotch - it might go well with the caramel!
4. The caramel would be easier to drizzle if it is at room temperature.

3 comments
Labels:

Hugs and Kisses Cupcakes


For Valentine's Day, we decided to keep it simple and just make cupcakes. It was a fun family affair - everybody pitched in and helped. It made baking so much fun! No fancy ingredients too - it was very semi-homemade. :-) 


What you need: 

1 box devil's food cake mix (I used Betty Crocker)
water, vegetable oil, and eggs called for on cake mix box
1 can (1 lb) fluffy white frosting
1 cup semi-sweet or milk chocolate chips
2 teaspoons canola oil
red food color


What to do: 

Heat oven to 350°F.

Place a baking cup in each of 24 regular-sized muffin cups. Make cake batter as directed on mix box. Divide batter evenly and spoon into muffin cups (about 2/3 full). Bake 20 to 23 minutes or until toothpick inserted in center comes out clean. Let cool in the pan for about 10 minutes, then move to a cooling rack. Cool completely, about 30 minutes.

Spoon about half of the whipped frosting to a bowl and add a few drops of red food color. Mix well. Add more food color until you get the shade that you like. Using a butter knife, spread frosting of your choice on top of the cupcakes in a round swirling motion. 

In a small microwaveable bowl, microwave chocolate chips and canola oil on full power for 1 minute, stirring once halfway through heating. Let cool for about a minute. Spoon melted chocolate in a resealable plastic bag and cut the tip to use as a piping bag. Decorate with X's and O's for "Hugs and Kisses." 


Tips, Tricks, and Tweaks: 

1. Make sure to let the cupcakes cool before putting frosting. Otherwise, the frosting would melt from the hot surface of the cupcake.
2. Use whatever frosting you have - it doesn't have to be white. Same is true with the food color. You can omit it entirely, if desired.
3. Be creative - decorate your cupcakes whichever way you want!
4. Sprinkle with candy heart decors for a more "Valentine" touch.

2 comments
Labels:

Snowman Cookies


The kids made Snowman Cookies to match our theme - Winter! Adorable, huh? And they taste good, too!


What you need: 

24 pieces sugar cookies
1 tub buttercream frosting
48 pieces red Lifesaver gummies
red and brown m&m's
about 2 cups of mini chocolate Kisses
Twizzler twist candies, separated


What to do:

Frost the sugar cookie with the buttercream frosting. Bend a Twizzler twist and put it on the top part of the "head" like a head band. Place a Lifesaver at both ends of the headband to make it look like ear muffs.

Use 2 orange m&m's for eyes, and a brown one for a nose. Form the mouth by placing small chocolate kisses on the bottom of the "face." Makes 24 snowman cookies.

Tips, Tricks and Tweaks:

1. Use any kind of candy! Size or color doesn't really matter.
2. Substitute sugar cookies with oatmeal cookies for lower fat.
3. Serve with milk!

2 comments
Labels:

Chocolate Truffles


I decided to make chocolate truffles for give-aways this past Christmas. There's something about making the gifts that you give to people you love. I feel that it is more personal, and just thinking that somebody took the time (and effort) to make something for me just warms my heart.

Real truffles are actually edible fungi. They are seasonal and hard to obtain (they grow in forests), and as such, are very expensive (I saw an ad  selling 1.75 oz of fresh black truffles for a whopping $350). Chocolate truffles are named such because of its resemblance to this fungi - especially if it is rolled in powdered cocoa. I don't know what real truffles taste like, but at $350 for about 2 ounces, I would settle for these yummy (and cheaper) chocolate ones!


What you need:

For the truffles: 
1 cup heavy cream
8 oz bittersweet chocolate, chopped
8 oz semisweet chocolate, chopped
2 teaspoon pure vanilla extract
1/2 teaspoon kosher salt
 
For the chocolate coating: 
1 package (11.5 oz) semi-sweet chocolate
1 tablespoon Canola oil

For toppings/dustings:
candy sprinkles
confectioner's sugar
unsweetened cocoa powder


What to do: 

In a medium saucepan over low heat, bring the heavy cream to a simmer. Remove from heat. Add the bittersweet and semi-sweet chocolates and stir until it's melted and the mixture is smooth. Pour the mixture in a bowl and let cool for about 15 minutes. Cover with plastic wrap and refrigerate for at least 2 hours to firm up.

Melt the package of semi-sweet chocolate on a double boiler over medium heat. When melted, lower the heat and add the canola oil. Mix well. 

Using a spoon or melon baller, scoop enough hardened chocolate ganache to make a 1-inch ball. Make it a circle by rounding it between your palms, then dipping it in the melted semi-sweet chocolate. Continue doing so until you use up all of your ganache. Refrigerate for another hour.

Roll the truffles in cocoa powder or confectioner's sugar. Or decorate the top with candy sprinkles. Serve at room temperature.


Tips, Tricks and Tweaks: 

1. Skipping the semi-sweet chocolate covering is fine, but it might not harden enough for rolling in cocoa powder. The chocolate actually provides an outer shell for the truffle.
2. Lessen the vanilla if it is too strong for you.
3. For flavored truffles, add about 2 tablespoons of orange, coffee, or hazelnut liqueur.
4. Try rolling your truffles in finely chopped peanuts, shredded coconut, or crushed toffee.


3 comments
 
Not Just A Food Blog © 2012 | Designed by Canvas Art, in collaboration with Business Listings , Radio stations and Corporate Office Headquarters