Labels:

First Signs of Spring


 Although technically, the vernal equinox won't be till March 20th, I can't help but be happy upon seeing these blooming buds - the first signs of spring.


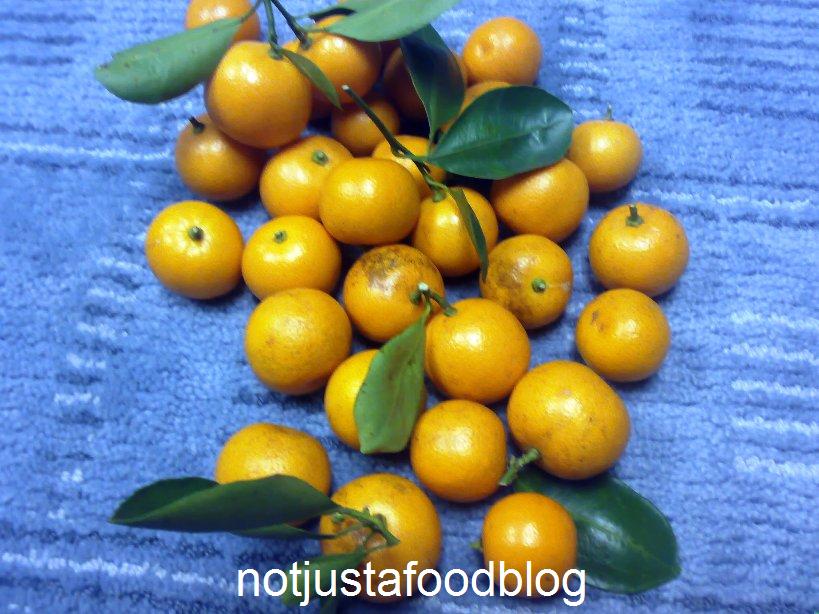
On a side note, we have planted two calamansi trees and one banana tree in the backyard. Can somebody say GREEN! ;-)

I know he looks sad right now - you would too if you just experienced frost!

I am so excited to have more fruit-bearing trees in our garden. It is such a joy to harvest fresh fruits (no pesticides or any chemicals!) from your own backyard. We thank the Lord for all the blessings everyday.

"...You shall rejoice in all the good things the Lod your God has given to you and your household." -Deuteronomy 26:11

2 comments
Labels:

Snowman Cookies


The kids made Snowman Cookies to match our theme - Winter! Adorable, huh? And they taste good, too!


What you need: 

24 pieces sugar cookies
1 tub buttercream frosting
48 pieces red Lifesaver gummies
red and brown m&m's
about 2 cups of mini chocolate Kisses
Twizzler twist candies, separated


What to do:

Frost the sugar cookie with the buttercream frosting. Bend a Twizzler twist and put it on the top part of the "head" like a head band. Place a Lifesaver at both ends of the headband to make it look like ear muffs.

Use 2 orange m&m's for eyes, and a brown one for a nose. Form the mouth by placing small chocolate kisses on the bottom of the "face." Makes 24 snowman cookies.

Tips, Tricks and Tweaks:

1. Use any kind of candy! Size or color doesn't really matter.
2. Substitute sugar cookies with oatmeal cookies for lower fat.
3. Serve with milk!

2 comments
Labels:

Chocolate Truffles


I decided to make chocolate truffles for give-aways this past Christmas. There's something about making the gifts that you give to people you love. I feel that it is more personal, and just thinking that somebody took the time (and effort) to make something for me just warms my heart.

Real truffles are actually edible fungi. They are seasonal and hard to obtain (they grow in forests), and as such, are very expensive (I saw an ad  selling 1.75 oz of fresh black truffles for a whopping $350). Chocolate truffles are named such because of its resemblance to this fungi - especially if it is rolled in powdered cocoa. I don't know what real truffles taste like, but at $350 for about 2 ounces, I would settle for these yummy (and cheaper) chocolate ones!


What you need:

For the truffles: 
1 cup heavy cream
8 oz bittersweet chocolate, chopped
8 oz semisweet chocolate, chopped
2 teaspoon pure vanilla extract
1/2 teaspoon kosher salt
 
For the chocolate coating: 
1 package (11.5 oz) semi-sweet chocolate
1 tablespoon Canola oil

For toppings/dustings:
candy sprinkles
confectioner's sugar
unsweetened cocoa powder


What to do: 

In a medium saucepan over low heat, bring the heavy cream to a simmer. Remove from heat. Add the bittersweet and semi-sweet chocolates and stir until it's melted and the mixture is smooth. Pour the mixture in a bowl and let cool for about 15 minutes. Cover with plastic wrap and refrigerate for at least 2 hours to firm up.

Melt the package of semi-sweet chocolate on a double boiler over medium heat. When melted, lower the heat and add the canola oil. Mix well. 

Using a spoon or melon baller, scoop enough hardened chocolate ganache to make a 1-inch ball. Make it a circle by rounding it between your palms, then dipping it in the melted semi-sweet chocolate. Continue doing so until you use up all of your ganache. Refrigerate for another hour.

Roll the truffles in cocoa powder or confectioner's sugar. Or decorate the top with candy sprinkles. Serve at room temperature.


Tips, Tricks and Tweaks: 

1. Skipping the semi-sweet chocolate covering is fine, but it might not harden enough for rolling in cocoa powder. The chocolate actually provides an outer shell for the truffle.
2. Lessen the vanilla if it is too strong for you.
3. For flavored truffles, add about 2 tablespoons of orange, coffee, or hazelnut liqueur.
4. Try rolling your truffles in finely chopped peanuts, shredded coconut, or crushed toffee.


3 comments
Labels: ,

Phở Bò (Beef Noodle Soup)


Pho is a nourishing soup that is a staple in Vietnamese cuisine. There are many versions of it, each one adding a different condiment or ingredient to suit one's finicky palate. The version I made was Phở Bò, which literally translates to Beef Noodle Soup.

Noodle Cart. Photo Credit
Noodle carts are very popular in Southeast Asia. I remember, as a college student, I would pass by Monumento and see these noodle vendors with a ton of customers (eating with no chair - they just stand!), which made me wonder if they really were that good. I have never tried buying them from the streets, though, and I have "Mang Elyong" to thank for that (he makes the best noodle soup!)

This is my take on Phở Bò, and this hot soup is perfect for these chilly winter blasts we are having!


What you need:

3/4 pound beef (top round)
1/4 Vidalia onion, sliced
1/2 teaspoon black peppercorn
1/2 tablespoon sugar
1/2 tablespoon salt
1/2 tablespoon patis (fish sauce)
2 - 3 star anise
half of a thumb-sized fresh ginger, julienned
1/8 teaspoon cinammon powder
2 bundles somen noodles

Toppings/Condiments:
green onion
hard boiled eggs
sriracha
toasted garlic
hoisin sauce
lime wedges


What to do: 

Put the onions, star anise, peppercorns, and ginger in a cheesecloth. Secure tightly with a string. 
Cheesecloth spices
In a pot over medium-high heat, boil about 6 cups of lightly salted water. Add the beef, patis, cinnamon powder and the cheesecloth. Cook for about an hour, or until beef is fork-tender. Remove the meat from the broth and refrigerate for at least 45 minutes.

Meanwhile, cook noodles according to package instructions. Cut the beef in thin slices. To serve, put noodles and toppings in a bowl and ladle broth on it. Serve with condiments on the side.


Tips, Tricks and Tweaks:

1. If using cinnamon stick, add it to the cheesecloth.
2. Add any topping/garnish that you like.
3. Some Phở Bò recipes call for really thin slices of beef cooked rare.
4. Add 1 whole clove if you like its flavor.
5. Traditionally, Phở Bò uses rice noodles. But you can use any kind of noodles!


3 comments
Labels:

Chirp! Chirp!

  
I found this bird nest in one of our trees in the backyard. As to what kind of bird built that nest - I have yet to find out. I have seen mockingbirds and cardinals on that tree before, though.

From another angle
  
"Are not five sparrows sold for two pennies? Yet not one of them is forgotten by God." - Luke 12:6


0 comments
Labels:

Creme Brulee

With blueberries on top!
Last Christmas, I received a creme brulee set as a gift and I was ecstatic! It has been on my wish list for the longest time and I was glad to have finally gotten it. So naturally, after the festivities were over, I immediately put the blow torch to use by making this creme brulee.


What you need:

2 cups heavy whipping cream
4 egg yolks
1/3 cup sugar
1 teaspoon pure vanilla extract
enough sugar to coat the top of brulee


What to do:

Preheat the oven to 325°F.

Scald the whipping cream by putting it in a sauce pan over medium heat. Let it simmer to a soft boil, then remove from heat (temperature should be about 180°F).

Mise en place

Meanwhile, whisk egg yolks and slowly add the sugar while whisking. Pour about a third of the scalded cream to the egg yolks and continue whisking. Then add in the rest of the cream and 1 teaspoon vanilla extract. Stir well.

Strain the mixture to remove any egg particles. Then ladle the mixture into individual ramekins. Remove the bubbles by torching it (my favorite part!) or fishing it out with a spoon. Place in a water bath* and bake in the oven for about 30 minutes. To check if it is cooked, give the ramekins a slight shake - the custard should wiggle a bit but hold its shape. Keep in the fridge for at least an hour.

Just before serving, sprinkle some sugar on top of the custard (as much as you want), and gently torch the top in a circular motion (the flame should be approximately 2 to 3 inches away from the sugar). Stop every once in a while to let the sugar crystallize, then torch again to have more browning.


*To make a water bath, place some towels enough to cover the bottom of a roasting pan, then place the ramekins on top of the towels. Pour in boiling water enough to reach half the surface of the ramekins.

DON'T use red towels for your water bath!


Tips, Tricks and Tweaks:

1. Don't over-whisk the mixture, and as much as possible, remove all bubbles!
2. Make sure the scalded cream is not too hot when you add it to the egg - otherwise, it would cook the egg on contact.
3.  Some water bath techniques do not use towels on the bottom - I recommend using it because the towels offer added protection to avoid over cooking the custard.
4. Don't be scared to torch your creme brulee - the burnt sugar would actually add a hint of bitterness to the sweet custard.
5. If using real vanilla, use just one vanilla bean and add it to the whipping cream while scalding it.

1 comments
Labels:

Spicy Prawns


This post is actually long-overdue. I cooked this before the recent oil spill, and I have not made any shrimp dish since. I already forgot about this dish, if not for the picture that was in the deep recesses of my folder (yeah, it's that deep! Haha).

I used chili garlic sauce in this recipe, but feel free to use Sriracha, Sambal Oelek, Tabasco, or anything else you have in your fridge.  


What you need: 

1 pound prawns
1 tablespoon chili garlic sauce
5 cloves of garlic, chopped finely
2 stalks green onion, chopped finely
thumb-sized piece of ginger, chopped finely
1 tablespoon rice wine
1/4 cup tomato ketchup
1 tablespoon + 1/2 tablespoon corn starch, divided
1 cup shrimp broth
1/2 teaspoon sea salt
2 teaspoon sugar
1 tablespoon canola oil, + more for deep frying


What to do: 

Rinse the prawns thoroughly. Remove the heads and save them. Using a boning knife, cut along the back of the shrimp and remove the veins. Wash, and use a paper towel to pat dry the prawns. Add a tablespoon of corn starch and toss to coat all prawns evenly.

Put the shrimp heads in a small sauce pan over high heat. Add about 1 1/2 cups of water. Bring to a boil. Lower the heat and let simmer for about 10 minutes. Let cool. This will be your shrimp broth.

In a small bowl, whisk the chili garlic sauce, ketchup and rice wine. Set aside. In a separate bowl, dissolve the sea salt, sugar, and 1/2 tablespoon cornstarch in shrimp broth.

Heat enough oil for deep frying in a saucepan. Add in the prawns and deep fry for about 2 minutes, or until cooked. Keep an eye on it - overcooked prawns/shrimps become rubbery. Let drain on a cooling rack and set aside.

Remove all the oil from the wok, save for about a tablespoon. Saute the garlic, ginger, and green onion for about a minute. Add in the ketchup mixture and the shrimp broth. Bring to a boil. Add the prawns and let cook for another minute.  


Tips, Tricks and Tweaks: 

1. DO NOT overcook the prawns - if using shrimps, reduce frying time to half.
2. Too spicy for you? Lessen the chili garlic sauce to suit your taste buds.
3. Substitute the shrimp broth with water. Or water with shrimp bouillon.
4. You can use fresh or frozen prawns for this dish.
5. For those with weaker constitutions, you can skimp the prawn head boiling. But it really gives a lot of flavor. 

2 comments
Labels:

Ham and Cheese Bites


Here's a great way to use left-over bread - bring it up a notch! Now, I wouldn't recommend using stale bread on this, but just those extra few pieces of bread that nobody wants to finish. 

This recipe is great as snacks for the kids, or stick a decorative toothpick on them and serve them in a party! 


What you need:

5 pieces of bread
slices of ham
slices of mozzarella cheese
2 eggs
1 tablespoon of milk
canola oil (for frying)


What to do:

Remove the crusts of the bread by cutting them off with a knife. Then, using a rolling pin, flatten the bread slices.

Top the flattened bread pieces with ham slices, then add a generous amount of mozzarella cheese. Roll the bread and set aside.

Meanwhile, in a bowl, beat the egg and add the milk. Stir well. Dip the rolled bread in this egg mixture and fry in hot oil until brown. Make sure you have enough oil to cover at least half the surface of the rolled bread, and it has to be VERY hot.

Remove from heat and place on paper towels to absorb the extra oil. Serve hot!

Note: I didn't fry my rolls long enough for the cheese to melt - but feel free to do so, if preferred.


Tips, Tricks and Tweaks:

1. Oil should be HOT. If you fry the bread in oil that is not very hot, the bread would absorb most of it. Not good!
2. Not a big fan of meat? No problem. Use pepperoni, turkey slices, bologna, or whatever you have in your pantry.
3. Want some crunch? Roll it in Panko or crushed corn flakes after dipping in egg!


3 comments
Labels: ,

Open-Faced Meat Sauce Sandwich


Who doesn't love a good meatball sandwich? Unfortunately, we had meat sauce instead of meat balls, so hubby decided to improvise. The result was a delicious open-faced sandwich, and it looked so yummy that I had to make one myself, too! So quick and easy - you can whip one in a jiffy.


What you need:

slices of bread
meat sauce
shredded mozzarella cheese


What to do:

Easy! Just pile some of the meat sauce on top of a slice of bread, then add shredded mozzarella. Enjoy!


Tips, Tricks and Tweaks

1. Use hard bread! Anything - ciabatta, Texas  toast, bagel - as long as it is hard! We used white bread and when the meat sauce got soaked, it turned soggy! :-(
2. If using regular bread, toast it first.
3. White cheese is the best to use for this recipe - they are not overpowering and are so stringy when melted.
4. Take the time to melt the cheese on top - it would be less messy!

1 comments
Labels:

Sister Schubert Hotdog Sandwich

  
I cooked hotdogs a few days ago, hoping to make sandwiches, only to find out that we are out of hotdog buns. Or any kind of bread for that matter. A quick look in the freezer showed that we have frozen bread - dinner yeast rolls to be precise. I had no choice but to use them. And I was glad I did!

It turned out to be delicious - I loved the buttery bread with the savory hotdog. I felt like I took my wiener sandwich to the next level!
And I thought Sister Schubert was a nun!
What you need:

Sister Schubert dinner rolls
hotdogs
butter
mayonnaise
cheddar cheese slices
mustard


What to do: 

Bake the rolls according to package direction - that includes putting a little pat of butter on top of the rolls before you bake them.
A little butter goes a long way!
Meanwhile, cook the hotdogs in boiling water for about 5 minutes. Let cool, then slice them in half crosswise, then lengthwise.

Spread some mayo and mustard on the baked rolls. Add the hotdogs and a slice of cheese. Garnish with pickle relish. Enjoy!


Tips, Tricks and Tweaks:

1. Use your favorite butter roll! 
2. Same with your condiments - add or subtract depending on your taste.
3. I used salted butter on top of the rolls. 
4. Make sure you always have butter in your fridge (NOT freezer) - it makes for easier cutting!

0 comments
Labels:

Owned!


This cardinal totally owned the bird bell! He actually chased 2 little chickadees away from it! (Pardon the home-made bird perch!)

1 comments
Labels:

Lechon Paksiw


I made oven-roasted lechon a few days ago, and of course what would follow but ol' reliable lechon paksiw? Hubby loved it so much that he almost inhaled it. 

Technically, paksiw is meat or fish cooked in vinegar and garlic. The addition of lechon sauce in this recipe is a yummy bonus - it keeps the meat moist and juicy, plus, you put to use the left-over sauce that goes so well with the lechon.
 

What you need:

1 pound cooked lechon, chopped
3/4 cup all-purpose sauce (I used Mang Tomas)
1/2 head of garlic, crushed
1/4 cup vinegar
1 medium onion, sliced
1/4 cup soy sauce
1/2 cup brown sugar
1/2 cup beef broth
1 bay leaf
1 teaspoon whole peppercorns
1/2 tablespoon canola oil


What to do:

Heat the canola oil in a skillet over medium-high heat. Add the onions and garlic and saute for about a minute. Add the rest of the ingredients, except the all-purpose sauce. Mix well. Reduce heat to low and let simmer for about 10 minutes, then add the all-purpose sauce. Cook for another 5 minutes, then serve with hot steamed rice.


Tips, Tricks and Tweaks:

1. If you want a saucy paksiw, add more broth.
2. Tweak the ingredients according to your preference - if you find this recipe a tad too sweet, lessen the sugar or add more broth. If you want it spicier, add more peppercorns.
3. Use real lechon sauce if available!

3 comments
Labels:

BBQ Beef and Bowtie Dinner


Have you ever seen old western movies where people would cook in their chuck wagons using their cast iron pots? That's exactly what came to mind when I saw this recipe from the Aug/Sept issue of Betty Crocker magazine. I don't know, it sounded rugged and rustic to me - like something a person from the old wild west would eat. 

Chuck wagon cooking. Source

The little "cowgirl" in me kicked in so I decided to whip up this dish. It is hearty, rich, and delicious. Easy to make, too. The only thing that's missing is a lasso. ;-)


What you need:
  • 1 lb ground beef
  • 1 cup chopped red bell pepper
  • 1 1/2 cups uncooked farfalle pasta
  • 2 1/2 cups beef broth
  • 1/2 cup barbecue sauce
  • 1/2 teaspoon salt
  • 1/4 teaspoon pepper
  • 1 cup frozen corn kernels, thawed
  • 1 1/2 cups shredded Cheddar cheese

What to do:

In a skillet, cook beef over medium-high heat for 5 to 7 minutes, stirring occasionally, until cooked. Drain the fat and return the meat to the skillet.

Add bell pepper, cook and stir for 1 minute. Stir in pasta, broth, barbecue sauce, salt and pepper. Bring to a boil, then reduce heat to medium-low. Cover, cook 15 minutes, stirring occasionally until pasta is tender.

Stir in corn and 1 cup of the cheese. Top with the remaining 1/2 cup of cheese. Cover and cook for about 4 more minutes, until the corn is hot and cheese is melted.


Tips, Tricks and Tweaks:

1. Use your favorite barbecue sauce for this recipe.
2. It is better to buy a block of Cheddar cheese when it is on sale, then store it tightly sealed in the freezer. It will be handy whenever you need it for a recipe.
3. You can also use microwaved corn for this dish.
4. Farfalle (bow-tie) can be substituted with any kind of pasta you prefer.


2 comments
Labels: ,

Product Review: Ghirardelli Chocolate Squares with Caramel Latte Filling


Thanks to the holiday season, we had a slew of sweets and other yummy goodies to fill our stash (think: bear getting ready for hibernation). Homemade, store-bought, self-made - you name it. But this by far is our favorite - the Ghirardelli Squares Milk Chocolate with Caramel Latte Filling. Here are our observations:

What we liked:

- Perfect for coffee lovers. You begin to get the latte taste even before biting (the aroma and all... *sniff* *sniff*).
- The first few bites are glorious as the caramel latte filling bursts out.
- The chocolate is not as waxy as regular Ghirardelli square varieties.
- You finish with the smooth milk chocolate, yet a faint hint of latte lingers in your mouth.
- Good balance of chocolate and caramel latte flavor.
- One chocolate square is only 57.5 calories. Yeah!!!

      What we didn't like:

      - It seemed like fate has played a cruel joke on us since every other piece was "broken" and the filling had spilled. It kinda' ruined the balance.
      - Eating more than two is too much. Like the Law of Diminishing Returns - each one has less and less positive impact (by the time you have eaten 3 squares, you'd probably have had more than enough).
        Yummy, gooey goodness!

        The Verdict:

        Of all the Ghirardelli Chocolate Squares variety in the market, this is probably the best. The flavor is so rich and creamy, and it truly delivered on its promise of caramel latte taste. We suggest eating a whole square in one bite, though. If you take little bites or nibble on it, you might not get the same effect. So open your mouth wide, cram it in, break the delicious chocolate with your tongue (or teeth), and savor the yummy goodness. Would I recommend it to a friend? A big YES. Will I buy it again? You bet.

        1 comments
        Labels:

        Calamansi Juice


        I was feeling under the weather lately so I made myself a tall glass of calamansi juice. I know, I know... they already debunked the myth of Vitamin C helping you get over colds. But old habits die hard, right?


        Yes, those are calamansi. Don't ask me why they are orange. They just are (though my friend said it's because it is winter here in the U.S. so the fruits changed color). But they ARE calamansi. Believe you me.


        What you need:

        • 4 teaspoons freshly-squeezed calamansi juice
        • about 1 1/2 cups of water
        • 2 tablespoons sugar
        • ice cubes


        What to do:

        Easy. Just combine all ingredients in a tall glass and mix well. Add bendy straw and drink pinky out for the "elite" effect hahaha. 


        Tips, Tricks and Tweaks:

        1. Can't find calamansi? Try lemon or lime.
        2. Instead of sugar, use honey.
        3. Remember to remove the seeds - they don't taste good!
        4. Adjust the amount of sugar according to taste.

        1 comments
        Labels:

        Happy New Year!

        Sparkling juice (non-alcoholic) for us!

        Cheers to 2011! Here's to more health and happiness this coming year.

        P.S. New year - new blog template! Do you like it?

        "Therefore, if anyone is in Christ, he is a new creation;  old things have passed away; behold, all things have become new." - 2 Corinthians 5:17
         

        2 comments
         
        Not Just A Food Blog © 2012 | Designed by Canvas Art, in collaboration with Business Listings , Radio stations and Corporate Office Headquarters